

How to Paint Your Garage Door Like a Pro
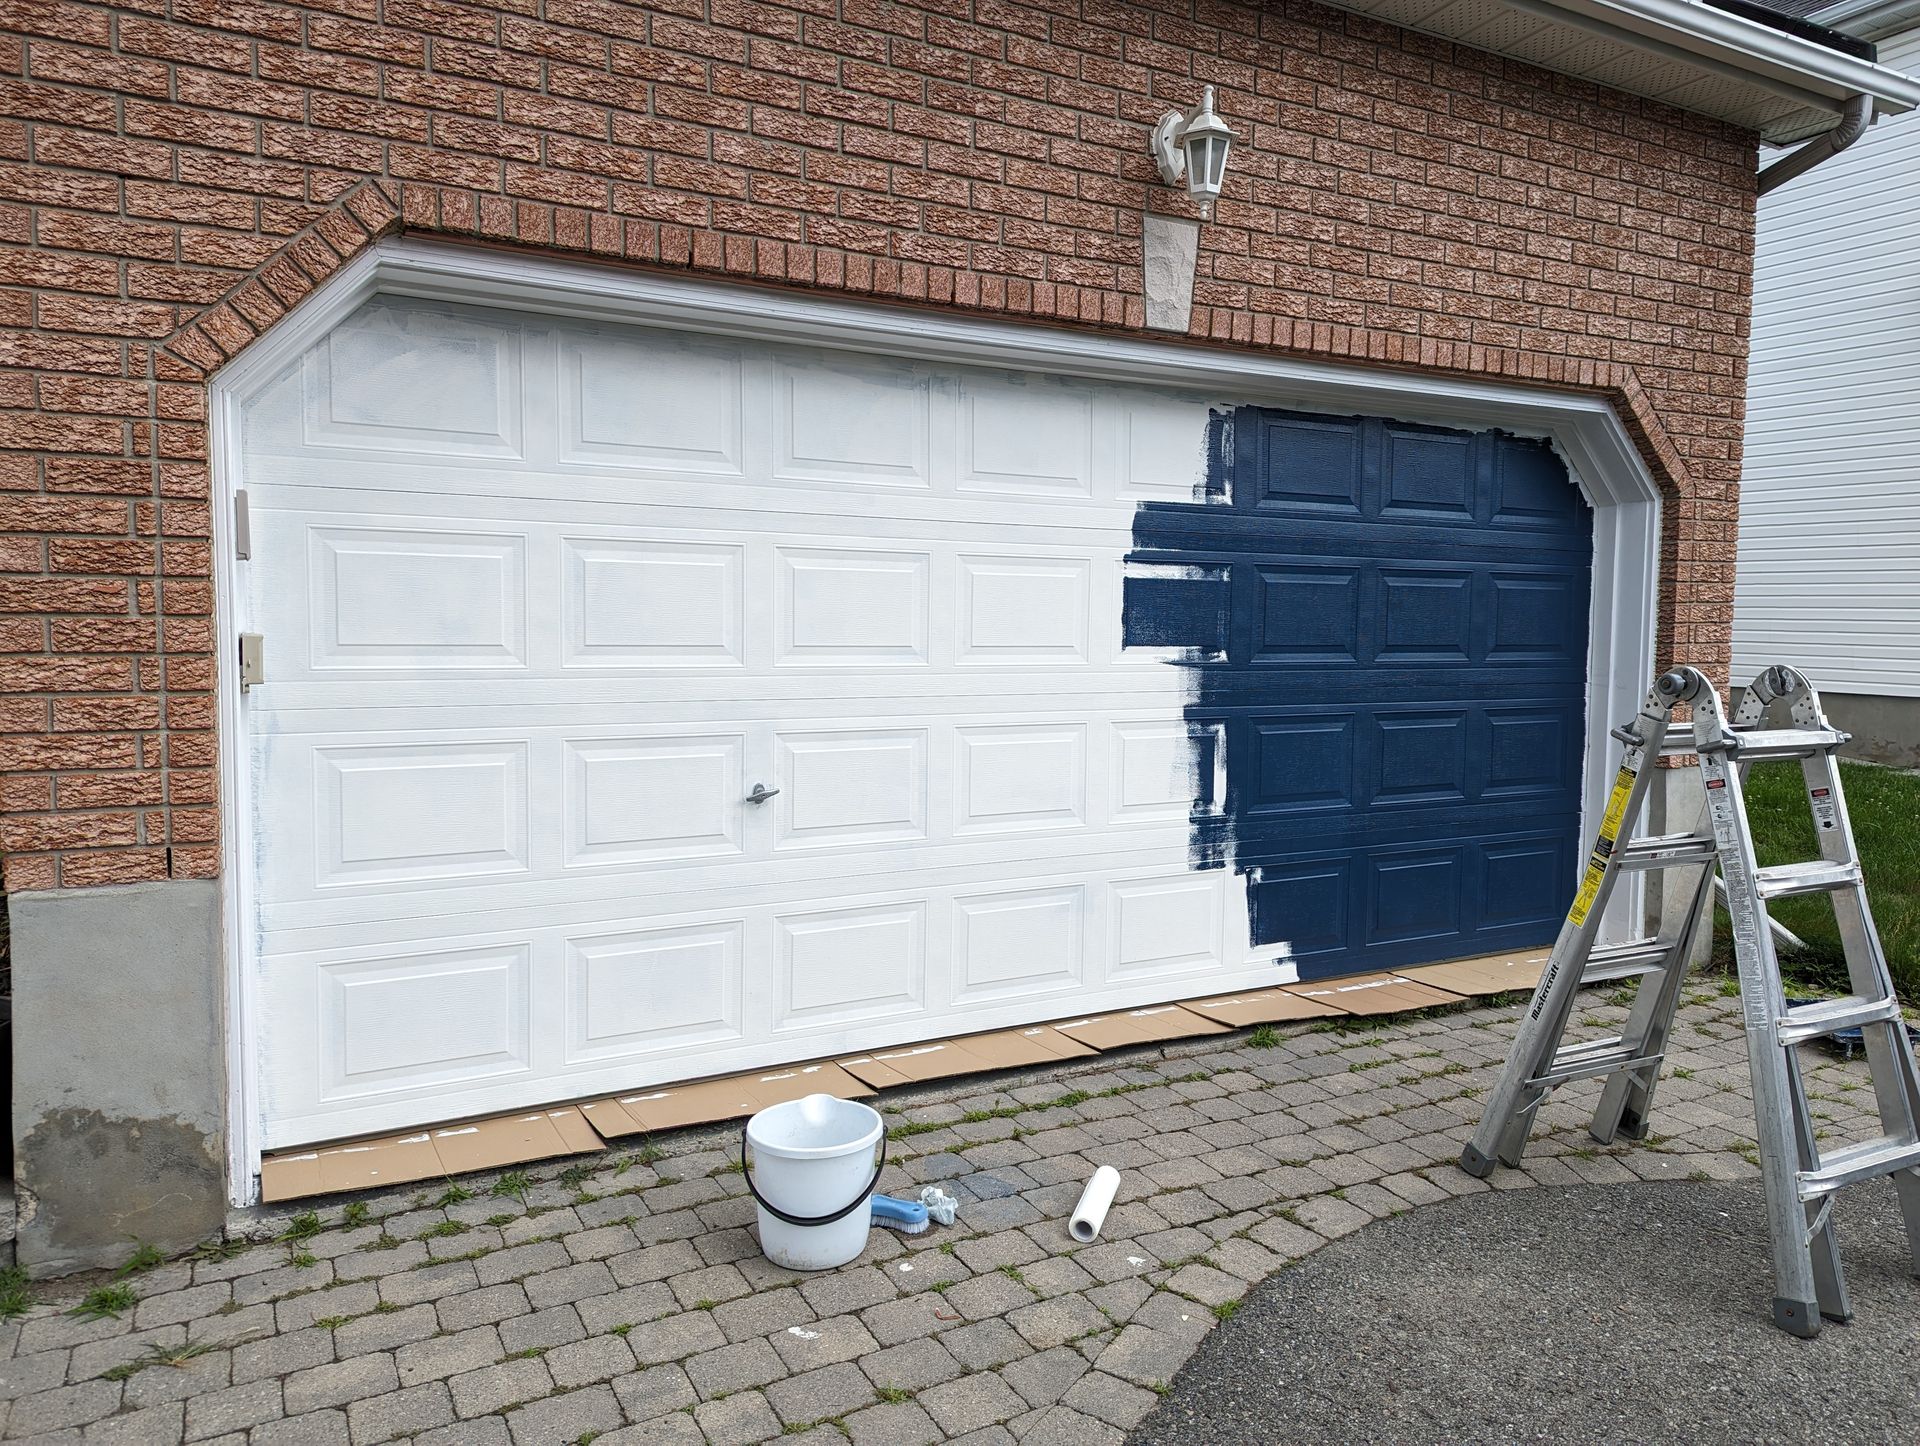
You're tired of your dull garage door and you're ready to make a change. You're keen to DIY it, but need some guidance. Don't worry, we've got you covered.
With this guide, you'll understand the best paint for your door, the tools you'll need, and the steps to get it done. From prep to final coat, we'll walk you through the whole process. Let's roll up our sleeves and turn your garage door from drab to fab.
Can You Actually Paint a Garage Door DIY?
Contrary to popular belief, painting your garage door is absolutely possible with the correct process and materials. The key lies in proper surface preparation and choosing the right type of paint. By following the steps below and using the appropriate materials, you can transform your garage door into a fresh, vibrant, and aesthetically pleasing element of your home's exterior.
Understanding the Best Paint for Your Garage Door
Choosing the right color and type for your garage door isn't just about aesthetics; it's also crucial for durability. Know what paint you need for your door type:
- vinyl doors need latex exterior paint
- while wood doors thrive with a stain-blocking primer and latex exterior paint
- Metal doors require acrylic or direct-to-metal exterior paint
Getting the right paint is just one step. To achieve a smooth, professional finish, you'll need to properly prep and prime your door, using high-quality brushes, rollers, and painters tape. Don't forget to apply a second coat if necessary for that polished, pro look.
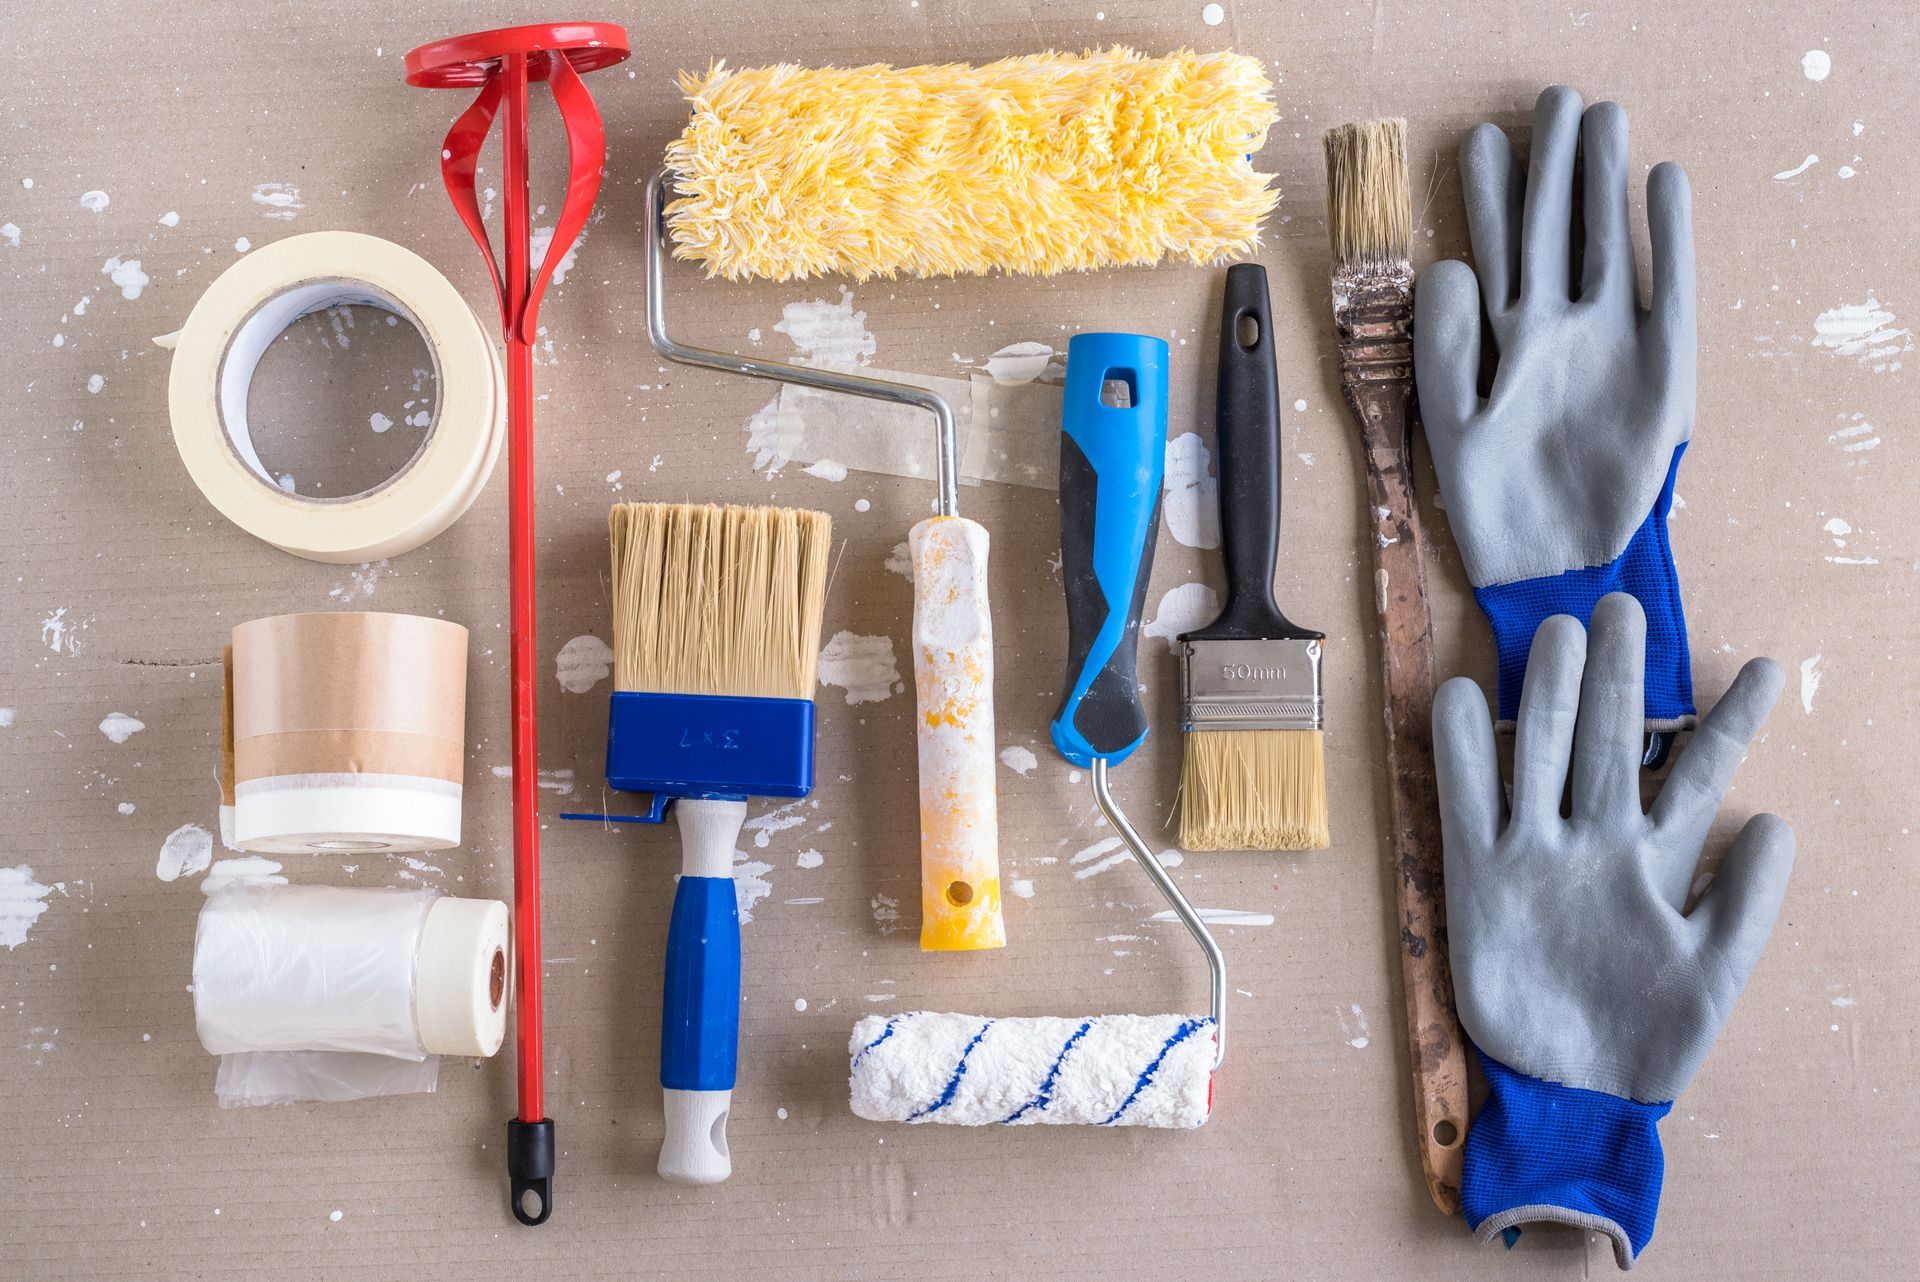
Necessary Tools and Materials for the Paint Job
To pull off a professional-looking garage door paint job, there are seven key tools and materials you're going to need. First, the right paint color.
Remember, latex exterior paint is best for vinyl and wood doors, while acrylic or direct-to-metal paint suits metal doors.
Next, you'll need paintbrushes and rollers. Don't forget heavy-duty painter's tape to mask off areas not to be painted. A drop cloth is essential to protect the floor from drips. A wire brush, palm sander, and fine grit sanding pad will help prep the surface.
Now, let's talk about tips for cleaning the garage door before painting. Use all-purpose cleaner to remove any dirt and grime, then rinse thoroughly. Ensure it's completely dry before painting.
Before you can dive into the painting process, it's crucial that you prepare the garage door surface properly to ensure the paint adheres well and the finish looks professional. Start by removing rust, old paint, and grime with a wire brush. Then, use a palm sander and fine grit sanding pad to create a smooth base.
Next, clean the door thoroughly with an all-purpose cleaner and rinse with a hose. Repeat this cleaning process if necessary.One common mistake to avoid in garage door painting is failing to let the door dry completely before moving on. Don't rush this process.
Once your door is clean and dry, you've successfully followed our tips for surface preparation, and you're ready to begin painting!
Guidelines for Taping Off Non-Painted Areas
When it's time to protect those areas you don't want painted, there's a specific set of guidelines for taping off non-painted areas that you'll need to follow. Start by using heavy-duty painter's tape to carefully cover handles, locks, and any trim you want to remain untouched. This step is crucial to achieving a professional-looking paint job on your garage door.
Remember, a proper technique for removing rust from garage doors before painting is key to ensuring durability and a neat finish. A wire brush will do the trick!
Lastly, when you're choosing the right paint color for your garage door, consider the overall look of your house. A complementary color can boost your home's curb appeal!
The Process of Priming the Garage Door
You'll notice a world of difference once you apply a high-quality primer to your garage door, creating a canvas for the final color. Priming increases paint adhesion, enhancing durability and providing additional protection to the garage door.
Some common mistakes to avoid while priming include:
- Skipping surface preparation
- Applying primer unevenly
- Not letting the primer dry completely
Avoid these by:
- Thoroughly cleaning and sanding your garage door before priming.
- Using a roller for even primer application.
- Allowing sufficient drying time before applying paint.
The benefits of using primer are immense, as it not only gives a smoother finish but also extends the life of your paint job. So, take your time, do it right, and your garage door will look like new.
Tips for Painting and Applying the Second Coat
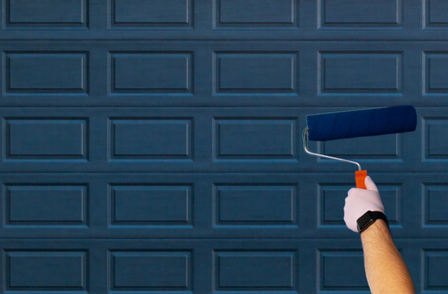
Let's dive into the process of painting your garage door and applying that all-important second coat.
Start with the inset panels, wiping excess paint for a smooth finish. Next, tackle the door's perimeter in 2-inch sections using a roller. Ensure even coverage to avoid streaks.
Now, it's time for that second coat. Assess your first coat—does it need more depth? If so, apply a second layer following the same techniques.
Remember, the key to achieving a smooth finish is patience and precision, so don't rush. Let each coat dry thoroughly before moving onto the next.
With these tips, you'll transform your garage door into a professional-looking masterpiece.
The Bottom Line
No matter the material, with the right paint and these easy steps, you can transform that worn-out door into a stunning showcase.
Remember, prep, prime, and patience are key. Enjoy the satisfaction and the neighborhood envy as you turn your garage from drab to fab, all by yourself.
Ready, set, paint!
Discover
excellent
local
businesses!
Our unique content—articles, ratings, reviews, and videos—help consumers make better purchasing decisions while promoting companies striving to provide customer service excellence.
| Recently Added |
|---|
| Accounting |
| Chiropractors |
| HVAC |
| Moving |
| Physical Therapy |
| Plumbing |
| Windows and Doors |
Is
your
business
in our
directory?
Update your business information to become more visible in our directory. Your lead form will also be activated.
Find your company >